11.4 Importing Channels, Policies, and Schema Items from the Identity Vault
A channel is a combination of rules and policies, and Designer allows you to import a channel instead of the entire driver. The Subscriber and Publisher channels describe the direction in which the information flows. The Subscriber channel takes the event from the Identity Vault and sends that event to whatever the receiving system is (application, database, CSV file, etc.) The Publisher channel takes the event from the application, database, CSV file, etc., and sends that event to the Identity Vault. The Subscriber and Publisher channels act independently; actions in one are not affected by what happens in the other.
11.4.1 Importing a Channel
To import an Identity Manager channel (a Subscriber channel or a Publisher channel) object (and all contained policies) into a driver:
-
Select either a Driver object or an Application object in the Modeler view.
The Driver object is represented by the line between the Identity Vault and the Application object and has a circle icon to represent it
 . The Application object connects to the Identity Vault through the Driver object.
-
Right-click a Driver object, then click .
or
Right-click an Application object and click .
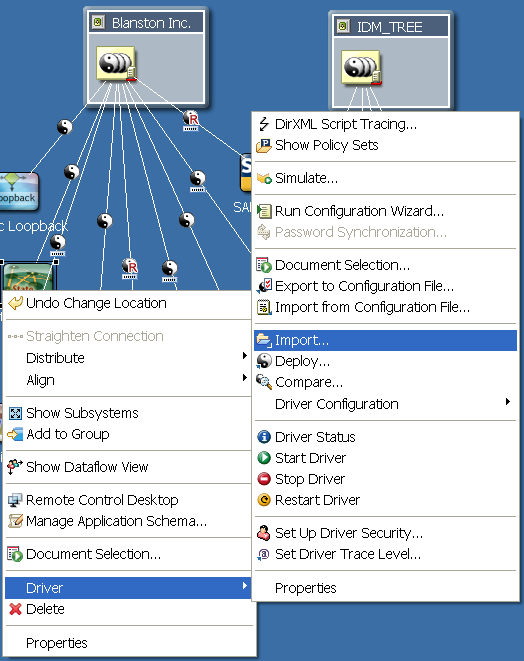
-
If Designer can’t authenticate to the eDirectory tree specified in the Identity Vault, you see the Identity Vault Credentials window if you have not previously specified the authentication credentials or if you do not save the password. Fill in the appropriate information and click .
-
In the Import from Identity Vault window, browse to and select either a Publisher or a Subscriber Channel object from the eDirectory tree under the corresponding driver.
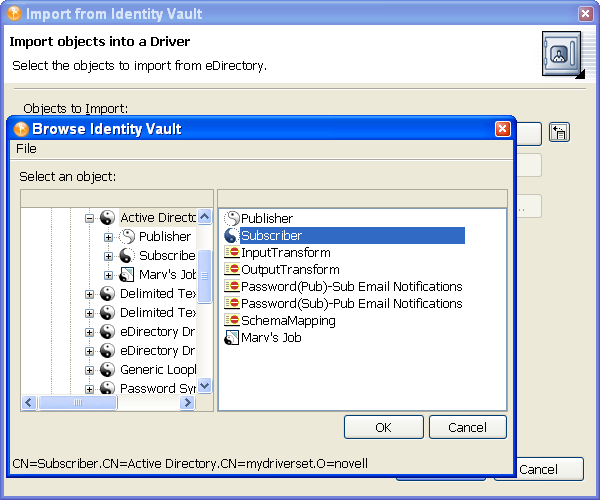
-
You can import more than one channel at a time; if you want to import both channels, select one channel, click , then browse to the next channel, select it, and click .
-
Click .
As the channel imports, you see the Import Summary window showing you the differences between eDirectory (the source of the import) and Designer (the destination).
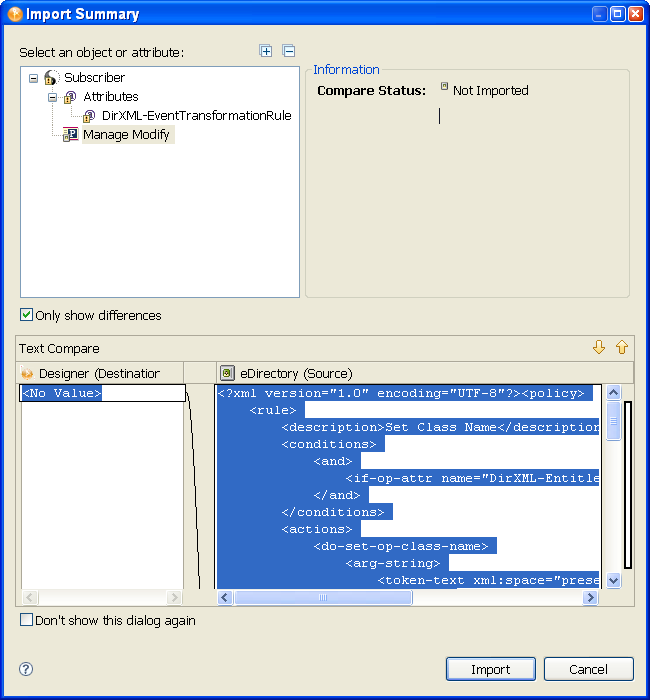
You can click the different objects in the channel view differences between the two drivers. All channel information is overwritten by the import procedure; however, the rest of the driver is unaffected.
-
Click .
For more information on Compare, see Section 11.5, Using the Compare Feature When Importing.
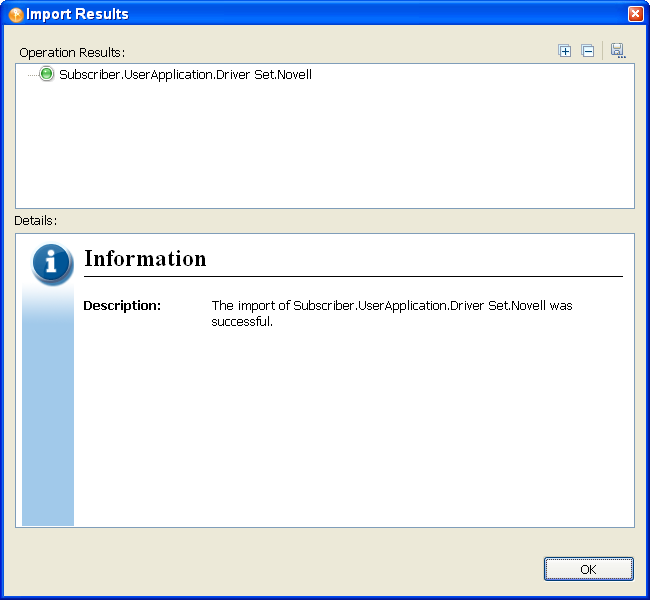
If there are any problems with the import procedure, they are displayed with a red icon in the Import Results window and you see an error description that is related to the operation results. If you have multiple errors, selecting an error displays the error’s description in the field. See Identity Vault Configuration Errors for further information.
-
Click to finish the import process.
11.4.2 Importing a Policy
A policy is a collection of rules and arguments that allows you to transform the data that an application sends to and receives from eDirectory. You use policies to manipulate the data you receive from eDirectory or from the connected system so they can synchronize the information in their databases. Each driver connects to a different system, and policies tell the driver how to synchronize the data on that connected system to the Identity Vault.
You might use the Import feature for policies more than anything else. For example, you can set up a policy to allow users with the title “Manager” to be placed in a specific container, no matter which application the information is coming from, and you can place this information in multiple connected systems. However, because each application is different, you need to modify the arguments and rules within policies to reflect those differences. For more information about policies, see Understanding Policies for Identity Manager 3.6 and Policies in Designer 3.5.
To import an eDirectory Policy object (for example, a rule or a style sheet) into a driver or channel (Subscriber or Publisher):
-
Select a driver in the Modeler view.
or
Click the tab and select a Driver or Channel object from the Outline view.
-
Verify that the authentication credentials in the Properties view for the selected Identity Vault are correct.
-
Right-click the Driver or Channel object, then click .
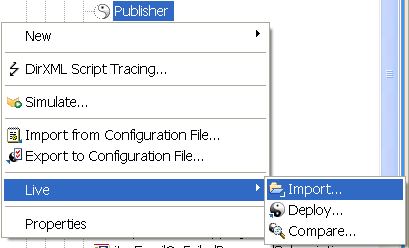
-
If the application can’t authenticate to the eDirectory tree, you see the Identity Vault Credentials window asking for the hostname, username, and password if you have not previously specified the authentication credentials or if you do not save the password. Fill in the appropriate information and click .
-
In the Import from Identity Vault window, click , then select a policy object from the channel you specified when you started the import process.
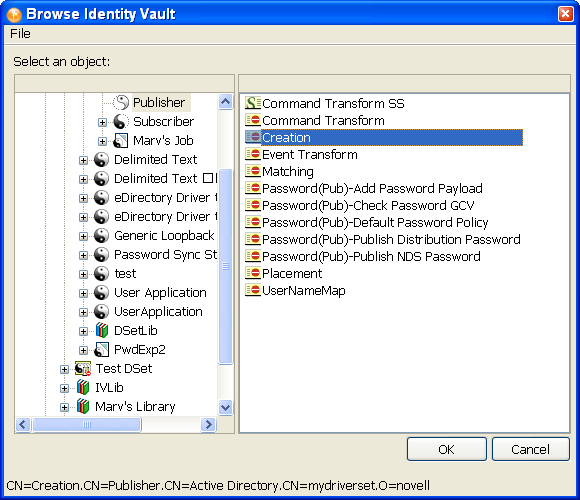
Policies are found under either the Publisher or Subscriber channel of a selected driver or under the driver itself. Be sure to match the proper policy to the proper channel or driver object.
-
Click , then click to import the policy.
You see the Import Summary window showing you the differences between eDirectory (the source of the import) and Designer (the destination). You can click the different objects in the policy to see what is different between the two policies. All selected policy information is overwritten by the import procedure; however, the rest of the driver is unaffected.
-
Click .
If the importing policy contains the same values as the policy in Designer, you are not allowed to import the policy. (See Section 11.5, Using the Compare Feature When Importing for more information on the Compare feature.)
Clicking brings up the Import Results window. If there are any problems with the import procedure, they are displayed with a red icon, and you see an Error description that is related to the operation results. If you have multiple errors, selecting the different errors displays the error’s description in the field. See Section 21.5.3, Error Messages and Solutions for further information.
-
Click to finish the import process.
For policy design, see the Policy Builder and Policy Management Help topics within the Designer utility. Also, see Understanding Policies for Identity Manager 3.6 and Policies in Designer 3.5.
11.4.3 Importing a Schema
You can import a schema from the Identity Vault or from a .sch file into your project. When you import a schema, you can select the whole Identity Vault schema (not recommended) or just the schema differences between the Identity Vault and your project.
-
Bring up the project in Designer’s Modeler view. Right-click the Identity Vault and select .
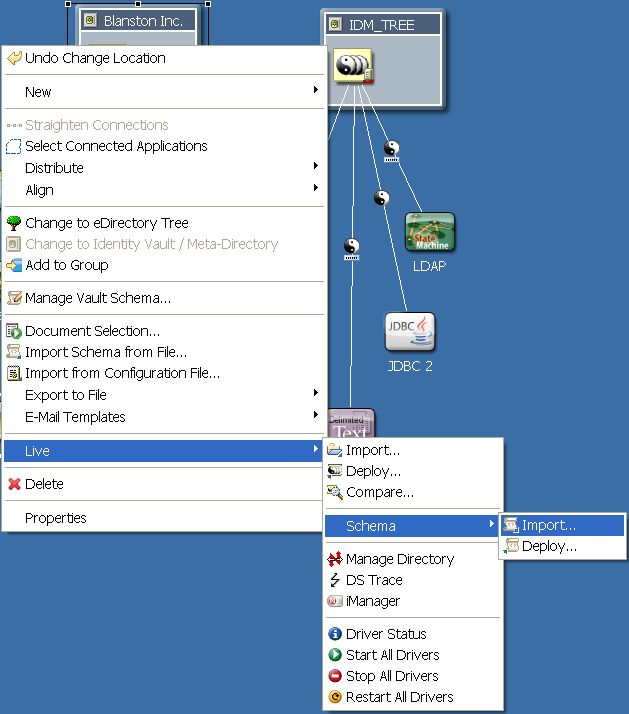
-
On the Select Source for Import page, select if you can connect to an actual Identity Vault.
NOTE:The specified user must have administrative rights to the schema.
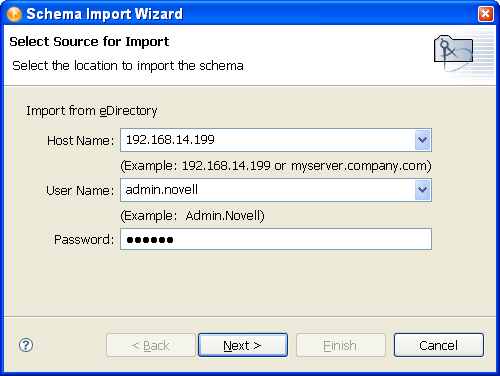
-
In the Import from eDirectory section, specify the hostname, username and password connection information.
The and entries have drop-down menus storing the last information you typed into these fields, which you can use for filling in these entries.
-
Click .
-
Decide which classes and attributes to import.
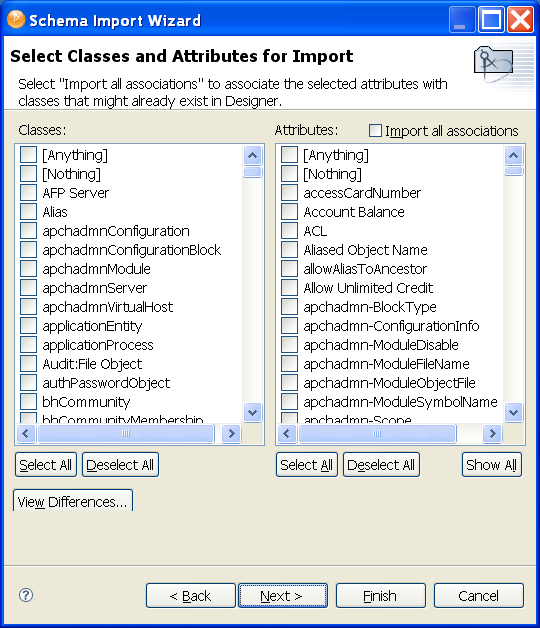
On the Select Classes and Attributes for Import page, you can select all of Identity Vault’s schema, including classes and attributes. However, this can create very large documents when you document the project (600 pages or more).
-
If you want to import all the classes and attributes, click , click , then skip to Step 8.
Select only the classes and attributes that you want to import. If you only want to import the schema differences between the live Identity Vault and the Identity Vault in your project, click , then continue with Step 8.
-
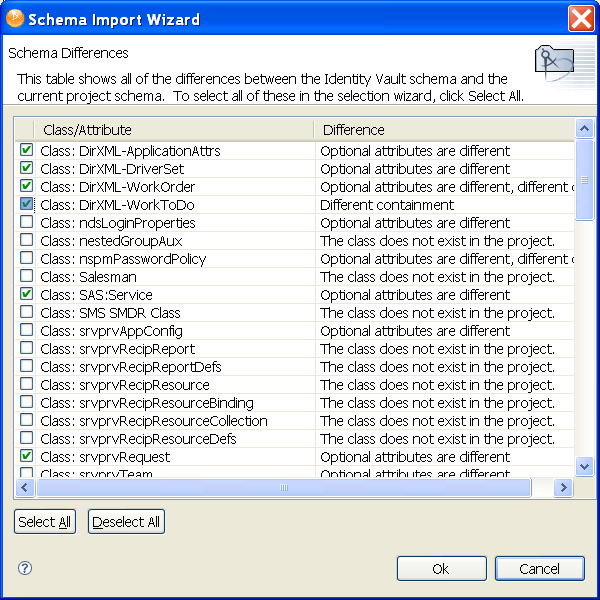
On the Schema Differences page, you see the schema differences between the live Identity Vault and the Identity Vault in your project. Click if you only want to import schema differences. Otherwise, click .
-
Selecting brings you back to the Select Classes and Attributes for Import page with the schema differences now selected under the Classes and Attributes headings. If you select any classes from the Schema Differences page, the box is selected. Leave it selected, as it enables you to associate the selected attributes with the classes that might already exist in Designer. Click .
If you selected on the Schema Differences page, make your schema selections on the Select Classes and Attributes for Import page, select the box (recommended), and click .
-
(Optional) Click if you want to see the Import Summary page to see the classes and attributes that you are importing. Then click .
-
On the Import Messages page of the Schema Import Wizard, click .
If you want to save the differences to a log file, click . This brings up the Save As dialog box, where you can choose a filename and directory to store the file in.
-
Click , then click .