4.0 Installing the Client Login Extension
The Novell Client Login Extension interacts with Novell Identity Manager and Novell SecureLogin applications for the user to log in to all the defined applications, and benefit from the password self-service for the Novell, Microsoft, and LDAP clients. The service is also available for DAS-enabled workstations.
However, availability of the service is based on the authentication interface of the clients.
Table 4-1 Password Self-Service Support for Clients
|
Authentication Interface |
Password Recovery Option |
||
|---|---|---|---|
|
During Operating System Login |
During Operating System Lock |
For DAS- Enabled Workstations |
|
|
Microsoft GINA |
Available |
Available |
Available |
|
Microsoft CP |
Available |
Available |
Available |
|
Novell Client GINA |
Available |
Available |
Available |
|
Novell Client CP |
Available |
Not available |
Available |
|
LDAP GINA |
Available |
Available |
Available |
|
LDAP CP |
Available |
Available |
Available |
You install the Client Login Extension and SecureLogin applications on the systems in which the password self-service feature is required.
NOTE:In order to set up the password self-service for Novell Client, install Novell Client before installing the Client Login Extension. For other clients, you can follow any installation sequence.
The Client Login Extension Configuration utility is available from the following locations:
-
Metadirectory server: c:\Novell\NDS\DirXMLUtilities\cle
-
Remote Loader server: c:\Novell\NDS\DirXMLUtilities\cle
-
Distribution media: root\windows\cle
The cle directory contains the following files for the 32-bit and 64-bit clients in the directories:
-
final (32-bit)
-
finalfor64 (64-bit)
To install the Client Login Extension:
-
From the cle directory, run Setup.exe to launch the Client Login Extension Configuration Utility installer.
-
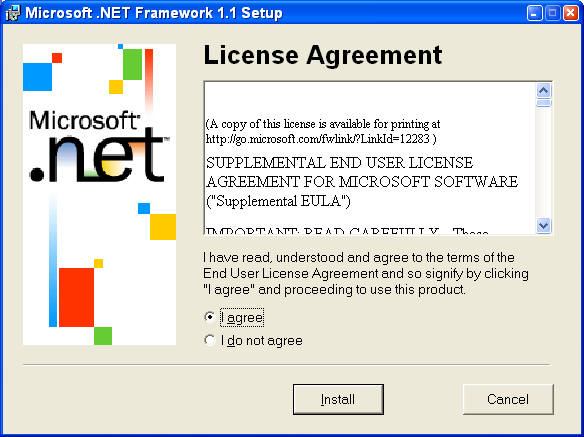
Click to continue with the installation. The installer checks to see if the .NET platform is installed on this machine. If .NET is installed, skip to Step 5. If it is not, you see the following dialog box:
NOTE:The Client Login Extension installer does not work if Microsoft .NET Framework 4 alone is installed in the system. Install Microsoft .NET framework 3.5 or an earlier version along with Microsoft .NET Framework 4.

-
Click to install the Microsoft .NET framework.

-
Click , then click .
After the.NET framework is installed, the Client Login Extension Setup Wizard is launched.
-
Read the information on the initial wizard page, then click .
-
On the License Agreement page, read the license agreement. If you agree, click, then click .
-
On the Select Installation Folder page, use the default directory selection or click to select a different directory.
For example, the default directory for Identity Manager 3.6.1 is C:\Documents and Settings\Username\My Documents\Client Login Extension Configuration Utility for Novell Identity Manager 3.6.1.
You can also select to create shortcuts for the currently logged-in user or for anyone who uses this computer. The default is .
-
Click .
-
On the Confirm Installation page, click to install the Client Login Extension Configuration utility and Client Login Extension files.
-
When the installation completes, click , then click .
The installation process creates two shortcuts to ClientLoginExtensionConfigurationUtility.exe, one for the desktop and one for the menu. The process installs the following folders and files in the installation folder:
-
ClientLoginExtensionConfigurationUtility.exe
-
Interop.WindowsInstaller.dll
-
license.rtf
-
Installer/
-
IdentityManagerClientLoginExtension_en.msi (English--default)
-
IdentityManagerClientLoginExtension_de.msi (German)
-
IdentityManagerClientLoginExtension_es.msi (Spanish)
-
IdentityManagerClientLoginExtension_fr.msi (French)
-
IdentityManagerClientLoginExtension_it.msi (Italian)
-
IdentityManagerClientLoginExtension_ja.msi (Japanese)
-
IdentityManagerClientLoginExtension_zh_CN.msi (Chinese Mandarin)
-
IdentityManagerClientLoginExtension_zh_TW.msi (Chinese Traditional)
-
-
-
Continue with Section 5.0, Configuring the Client Login Extension MSI Files.